Showing posts with label Games and School Stuff. Show all posts

School Games for EVERY AGE


Here are some fun games for those transitional times between subjects.  Or games to use when practicing a specific skill.

Measurement Scavenge


Supplies needed:  one ruler per child
How to play: simply call out a measurement between 1 and 12 inches.  The children run around measuring things.  First one to bring the object with the correct measurement back wins. 
Variations: you can use a yard stick, tape measure, or flip the ruler and do centimeters.


COLOR SCAVENGE 


Supplies:  paint chip cards from any hardware store
How to play:  Pass out the paint chip cards and have the children run around trying to match a color on their card to something in the house. 
Variations:  you can also just call out a color.  Call out colors in another language.  Have the children draw out slips of color from a jar. Play this game outside, slip the cards into your purse to use at a park.
 The kids can color match every hue on the card.  The kids can color match big objects like furniture, the floor, and walls.  Sky is the limit.  This is a great indoor game, but can also be played outside.


Shape Scavenge


Supplies: cards with shapes on them. (draw shapes on index cards)
How to play:  have the children draw one card and run around the house or outside looking for that shape.  First one back is the winner.  
Variations: have the children work on teams and pass out five cards to each team. 


Number Scavenge


Supplies: Number cards or a deck of playing cards with the kings, queens, and jacks taken out.
How to play:  have the children draw a card and then collect that number of like things.  Examples: 8 books, 4 pictures, 10 spoons. Make sure they replace all their collections at the end of each turn or you will have some major clean-up when the game is over. 
My son is super creative with this game.  He came up with the money equaling $8, and the thumb-drive with 16 files on it. You just never know how your kids are going to surprise you, I thought he would be bored with this game. 


Find it in the RICE 

Supplies: One plastic bottle, some dry rice, small objects that can fit through the bottle opening, a camera, and printer.
How to play:  First, take a picture of the small objects you are going to put in the bottle.  Then fill the bottle with the small objects and the rice.  Screw the lid on VERY TIGHT, or glue/tape it on. Print out your small objects picture.  I slipped my picture into a plastic sleeve so the kids could cross off the objects with a dry erase marker as they find them. The kids take turns finding the objects in the rice.  This is a great game for the car or any other quiet time. 


Remember to make it fun.  kids have an abundance of energy and imagination. Ask them to make up a game or two, you may be surprised what they come up with. 

Pre-School Busy Boxes


Yet another year of homeschool begins.  This year I am managing three kids in the lesson plans.  I have a 6th grader, a 4th grader, and  a pre - schooler.  I have a plan to make everything work, and it all has to do with these plastic bins I got from COSTCO. I have also seen these at MICHAELS craft store, they are scrapbook supply storage bins.  I like the large square size of the boxes, and they stack together.  I am going to call them "Busy Boxes."  

There are five boxes, one for each day of the school week.  Each box is filled with fun activities: worksheets, play-dough, games, craft kits, sorting activities......the list goes on and on......let me show you some ideas I have for the boxes.  Each week it will change, each week I will come up with five more fun filled boxes........can I take the pressure???? We shall see. 

 This is an example of one box. I am trying to mix in activities that she can do alone as well as activities I will help her with.  All the flashcards will be done with me,  the alphabet puppets can be colored and cut out by her,  with help from me to glue them down on the paper-bag in the right places.  The stamps are more of a filler activity when she gets frustrated with something, or I need some time with the older kids alone.  

We are going to be building a number train across the top of the wall, she will start that activity today.  Each day we will add a new train car to the line which has a new number on it.  I pre - cut these train cars to make it simple to put up right when she decorates the car and puts the number of the day on it. My daughter loves mini books that she can color, so today she will color a mini book of "Billy Goats Gruff" and do some activities with that.  

I am going to introduce a Bible story every other day.  It is nice to store the book in the Busy Box so I can keep track of it.  I have some stickers to make a story scene of this story.  She is also going to make a lion mask.  If I can get the older kids involved later on in the day we will act out the story.  

I am going to find a cartoon DVD that relates to one of these themes and add that to the box for the ultimate melt down, which tends to happen right before lunch.  I will have 30 minutes of bliss while that is on. 
As you can see the number train is growing.
The alphabet puppets are being made.  We try and make up a song with each of the letters.

Here are some other ideas I am working on for the rest of the boxes.  
 Sorting colored beads of different sizes and hues.
 This is a fun activity, print out a close up facial shot of a family member, this is my sister.  Laminate, or slip the picture into a clear plastic sheet.  Use dry erase markers or dry erase crayons for hours of fun.  And remember to make one of these a picture of your child so they can dress themselves up too!
 Paint chip color match.  This activity is SUPER EASY to put together.  Simply go to your local hardware store and get some paint chips, some clothes pins, and glue.  Cut a thin strip off the side of the paint chip and glue a piece of each color on separate clothespins.  It is fun to match the different hues of color.  My older kids couldn't resist this. 
You don't have to MAKE everything.  Throw some paint with water pages in each box, NO MESS, just water and a paintbrush. 


I have gotten a lot of inspiration from the following blogs.  Check them out.
http://playathomemom3.blogspot.com/
http://delightfullearning.blogspot.com/
http://almostunschoolers.blogspot.com/
http://adventuresinpinteresting2012.blogspot.com/

Make A DOLL BED

This is a SUPER EASY, inexpensive, expressive art project for the doll lover.  My daughters love playing dolls, trouble is there is never enough beds for all their dolls.  So we came up with this inexpensive way to house them all.

MATERIALS:
1 cardboard box (the size of the doll you want the bed for)
scissors
paint/decorative materials

 Cut the flaps off the box, save one of the shortest flaps for the next step.
Use the short flap to make a head/foot board design.  Simply fold the flap in half and make half of the design.  Cut your design out while the flap is folded so you get a nice mirror image, and both sides are even.
 Use your head/foot board design you just cut out to trace over each skinny end of the box.  Then cut out each side.

 You can cut the long sides of the box as ornate or deep/shallow as you wish.  Make sure you keep some of the lower sides on so the bedding doesn't slip out.
 HAVE FUN, and paint your bed any color, use glitter, glue on lace, make cute designs with stencils. 


SNOWFLAKES To Cut And Decorate With

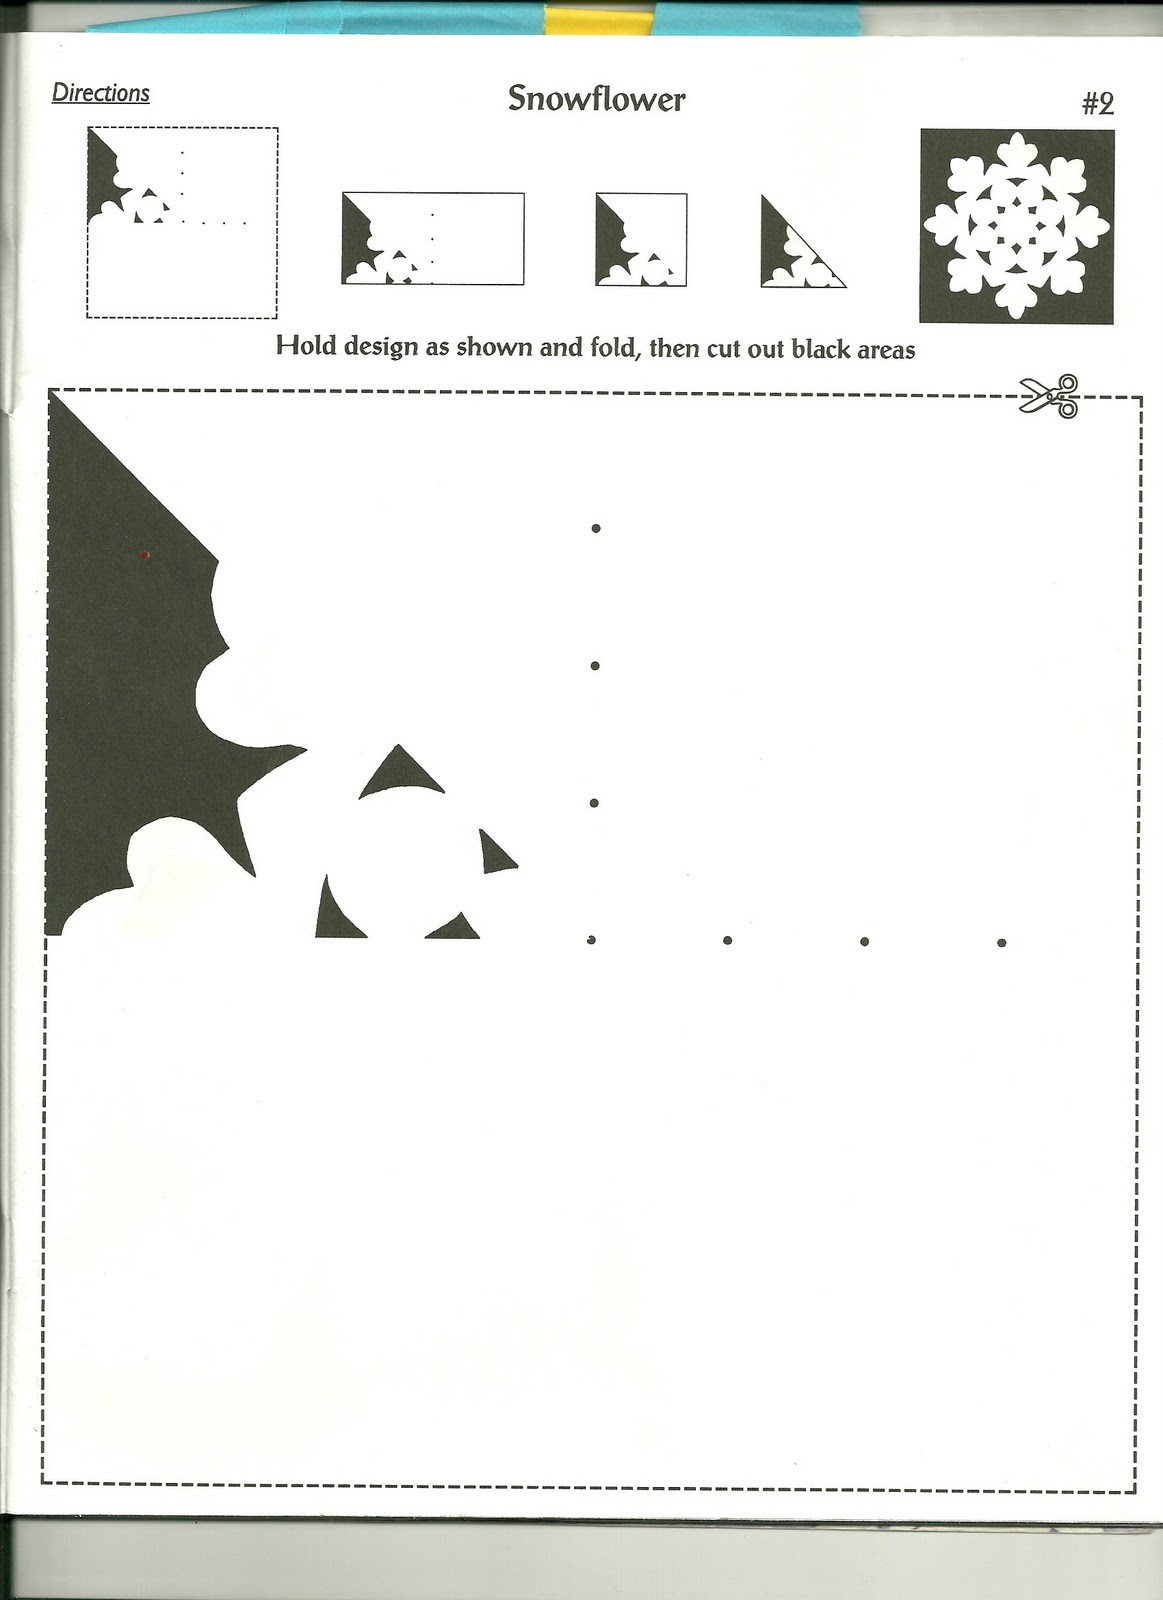
My kids LOVE doing Christmas crafts.  This is a nice one, and is soooooo simple.  Simply follow the directions at the top of each snowflake page.  Hopefully you can just copy or save each picture and print them out.  I can email this pages to you if you want to go that route!  Enjoy!


Puzzling Behavior

How many times have you tried to get your young child to eat their meal?  I have lost count and become so frustrated that I was determined to do something about it.  This idea popped into my head one day.....
MATERIALS NEEDED:
*one 25 piece preschool puzzle
*child who doesn't like to eat
*a meal

Follow the pictures for the flow of events........
 My youngest isn't the most cooperative eater, and usually puts up a HUGE fuss during the meal which makes everyone else at the table a little on edge.
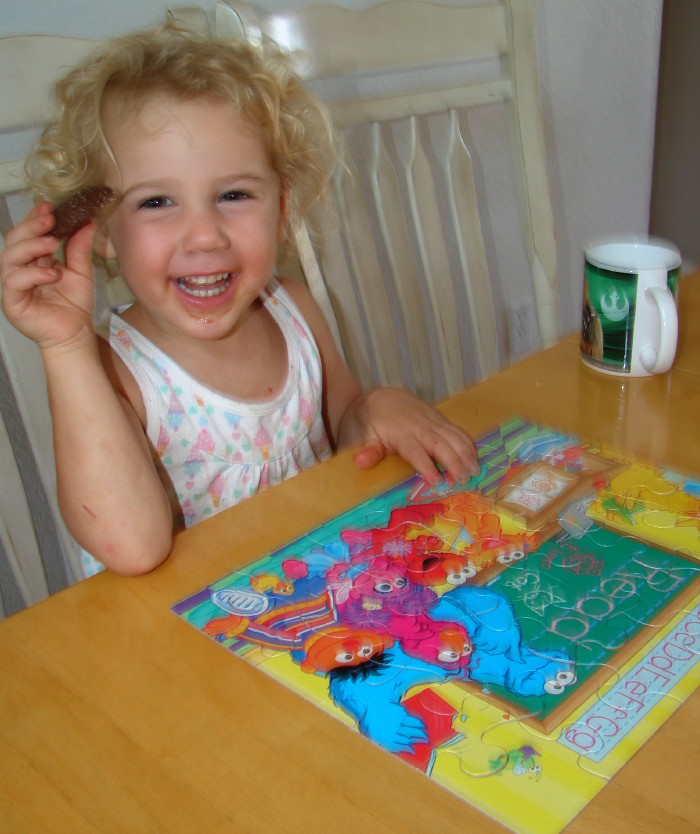
What I am suggesting here is to reward each bite of food with a puzzle piece.  As they gather more pieces with each bite they can start putting the puzzle together.  Soon they forget that they should be putting up a fight with each bite, and instead can't wait for the next bite to get another piece to the puzzle. 
I stopped reminding her that she had to take a bite of food for a puzzle piece and she just kept eating on her own.  At one point I was afraid I was going to run out of puzzle pieces!
She got so excited near the end because she saw her prize so near. 
The prize was a COOKIE! 
I figure that this worked so well because it broke up the long process of eating into small bites with little rewards along the way.  She even ate her salad. 

OTHER VARIATIONS : You could say each piece is worth two bites.  You could make your own puzzle up with a picture of the dessert you were having that night so it is almost like a guessing game.  This Puzzle game could be used for good behavior at the table, practicing table manors.  You could extend this idea with older kids by having them earn puzzle pieces for good behavior throughout the day and completing the puzzle for a prize at the end of the day

How To Build an EXTREME WATERSLIDE

 If you have a slope anywhere on your property or know of a park that has a hill you need to do this!
I was watching my kids power down our little hill out back on their Tonka trucks one day and got a bright idea. Why not build a huge water slide? We have had a few of those store bought slip and slides in the past but they would only last a week if that.  I wanted something an adult could play on.
So here is what I came up with, and maybe you want to make one too!
First you find your hill of choice.  Make sure you have enough running room at the top so you can get up to speed to slide.  And think of where you are going to land, make sure it is safe at the bottom. 


Next use some sort of material to make sides.  I used wood chips because that is what I had an excess of at the time.  you could use sand, soft dirt, or dig a trench wide enough to slide through. Keep the middle of the run free of large rocks and sticks.  


You are going to need some old carpet remnants or rugs.  I got all this for free through my local Craigs List.  People are more than happy to give away old carpet.  And it can be old and ratty, it doesn't matter because you are going to cover it up.  


Lay all the carpet down the run, the more the better because this is your padding.  This carpet also helps to keep the form of the run by holding everything in place. 


Now get out your HUGE roll of black construction plastic. It is a little pricey but you are going to need to get the large wide roll.  Roll this plastic down the slide run and secure it on the sides with landscape staples or pegs.  


The top of the run is a little tricky.  You are going to need to keep the plastic from sliding down and you can't use anything that you can trip over.  We rolled the top of the plastic in a 4x4 post and stapled it on securely.  We then buried the post at ground level. We even added some low posts at the top so the 4x4 doesn't dislodge.  Now you can't trip over the top and the plastic doesn't slide down. 


Now you have the think about water.  You could run a little sprinkler at the top or simply have a hose on low trickling down.  The possibilities are endless.  One word of warning: the black plastic can get very hot if there isn't enough water running or you are the first one to slide down the run. Don't let kids slide alone.  THIS CAN BE DANGEROUS!  We had someone almost break an arm on this thing last year!


My son is using a blow up pool matress to slide down here.
Using varrious blow up toys will make the slide more fun!


Add a little dish soap to your water once in awhile to cut down on the friction.

Older Post ►
 

Copyright 2011 a RANCH wife is proudly powered by blogger.com